
Contents
- 1 How to Build a Shipping Container Home Step by Step
- 1.1 Step 1: Plan Your Container Home Project
- 1.2 Step 2: Choose and Buy Your Shipping Container
- 1.3 Step 3: Design Your Container Home Layout
- 1.4 Step 4: Prepare Your Site and Foundation
- 1.5 Step 5: Modify Your Container
- 1.6 Step 6: Install Utilities and Systems
- 1.7 Step 7: Finish the Interior and Exterior
- 1.8 Step 8: Final Inspections and Move-In
- 1.9 Need a Detailed Guide? Try This eBook!
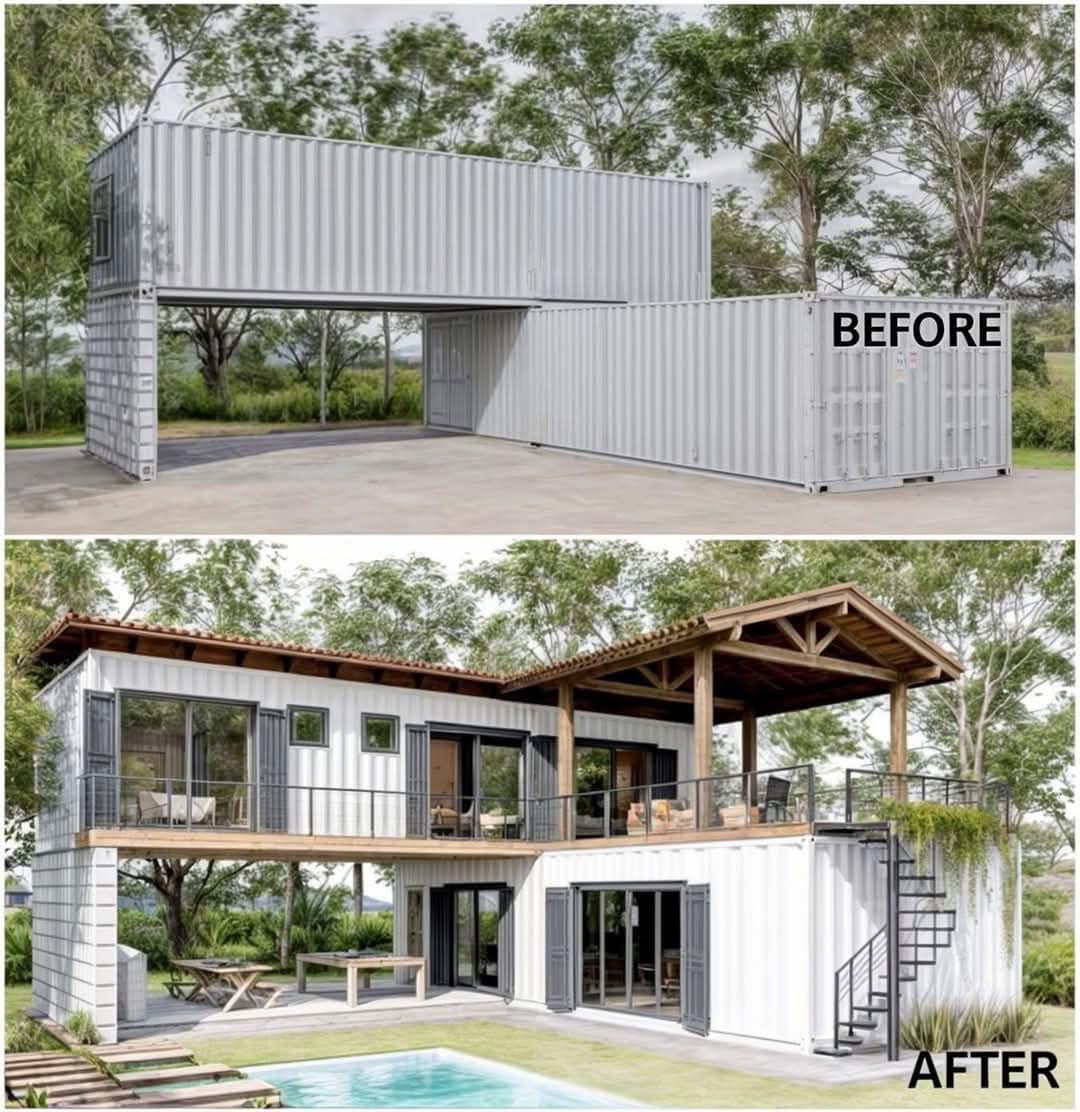
How to Build a Shipping Container Home Step by Step
Dreaming of a unique, budget-friendly home? Building a shipping container home is an exciting way to create a sustainable, stylish space without breaking the bank. At Shipping Container Homes Book, I’ve put together this step-by-step guide to help you navigate the process with confidence. Whether you’re a DIY newbie or a seasoned builder, these practical steps will get you closer to your container home dream. Let’s dive in!
Step 1: Plan Your Container Home Project
Before you touch a shipping container, planning is key. Start by defining your goals: Are you building a full-time residence, a weekend getaway, or a home office? Next, set a realistic budget. On average, a 20ft shipping container home costs $10,000 to $30,000, depending on size, finishes, and location. I learned the hard way that adding 15% to your budget for unexpected costs—like permit fees—can save you a lot of stress.
Research local zoning laws in your area, as some U.S. states have strict rules about container homes. For example, California is more container-friendly, while rural Texas might require extra permits (around $500-$2,000). Use online tools like PermitFlow to check regulations and avoid fines down the road.
Step 2: Choose and Buy Your Shipping Container
The foundation of your project is the container itself. You’ll typically choose between a 20ft container (160 sq ft) or a 40ft container (320 sq ft). I recommend a “one-trip” container—they’ve only been used once, so they’re in great shape and cost $2,000 to $4,000. Used containers are cheaper (around $1,500), but inspect them for rust, dents, or chemical smells from past cargo.
I scored my 20ft container on Craigslist for $2,500, saving $500 by buying locally. Check sites like Container One or eBay for deals, and always negotiate delivery fees—they can range from $500 to $1,500 depending on distance.
Step 3: Design Your Container Home Layout
Now comes the fun part—designing your space! Use free tools like SketchUp to sketch a layout that maximizes space and light. For a 20ft container, I went with an open-plan living area, a small kitchen, and a loft bed to save floor space. If you’re building a 40ft home, you can add a separate bedroom or bathroom.
Focus on natural light—large windows and skylights make a huge difference (around $300 each). I also planned for modern touches like solar panels, which are trending in the U.S. for sustainable living. If design isn’t your thing, consider hiring a consultant for $300-$500 to create a blueprint you love.
Step 4: Prepare Your Site and Foundation
Pick a flat, well-drained site to avoid flooding—check FEMA flood maps for your area. Clear debris and level the ground with a rented compactor ($50/day). For the foundation, you’ve got options: concrete slabs ($3,000-$5,000) are sturdy, while concrete piers ($1,000-$2,000) work better for uneven land. I chose piers for my rural lot and saved a bundle by doing the prep work myself.
Make sure your site is accessible for delivery—narrow roads might require a crane ($300-$500). I had to widen my driveway to avoid extra fees, but it was worth it!
Step 5: Modify Your Container
Time to transform your container into a home! Start by cutting openings for windows and doors using a plasma cutter (rent for $100/day). Reinforce the cuts with steel beams to maintain structural integrity. Sandblast any rust, then apply a weatherproof paint to protect against the elements.
Insulation is a must—containers get hot in summer and cold in winter. I used spray foam insulation with an R-value of 20 (about $1,000 for a 20ft container) to keep my space cozy year-round. This step took me a weekend, but it’s essential for comfort.
Step 6: Install Utilities and Systems
Make your container home livable with plumbing, electricity, and HVAC. I installed PEX pipes for water ($1,000-$2,000) and wired the space for lighting, adding solar-ready circuits for future upgrades. A mini-split AC/heater ($1,500) works great for most climates—I added a smart thermostat, and my energy bills dropped by 30%!
If you’re off-grid, consider solar panels ($2,000-$5,000) and a composting toilet ($500). These upgrades align with the growing trend of sustainable living in the U.S.
Step 7: Finish the Interior and Exterior
Now it’s time to make your container home your own. For the interior, I used bamboo flooring and reclaimed wood walls for an eco-friendly vibe ($800 total). Add multi-use furniture—like a fold-down desk—to save space. For the exterior, I painted mine with UV-resistant coating and built a small deck for curb appeal ($500).
Personalize with art or plants to create a warm, inviting space. I spent a weekend on this step, and it made my container feel like a true home.
Step 8: Final Inspections and Move-In
Before moving in, hire an inspector ($200-$500) to ensure everything meets safety standards. You’ll also need an occupancy permit, which varies by state ($100-$1,000). Once approved, pack your bags and enjoy your new container home! I celebrated my first night with a BBQ on the deck—it was a moment I’ll never forget.
Need a Detailed Guide? Try This eBook!
Building a shipping container home is a rewarding journey, but it can feel overwhelming without the right guidance. That’s why I recommend the Shipping Container Home eBook—it’s packed with detailed blueprints, cost-saving tips, and step-by-step instructions to simplify your build. I used it for my project, and it saved me hours of research! Ready to get started? Check out the Shipping Container Home eBook here and take the guesswork out of your container home project.